Requesting reimbursement from your insurance company
Step 1: Get the Superbill
A “superbill” is a document showing the services you received, the amount you paid and your diagnosis. Superbills can be manually generated by me at your request. I can also set them to get automatically generated and sent to your e-mail address at the beginning of each month. Let me know what you’d like.
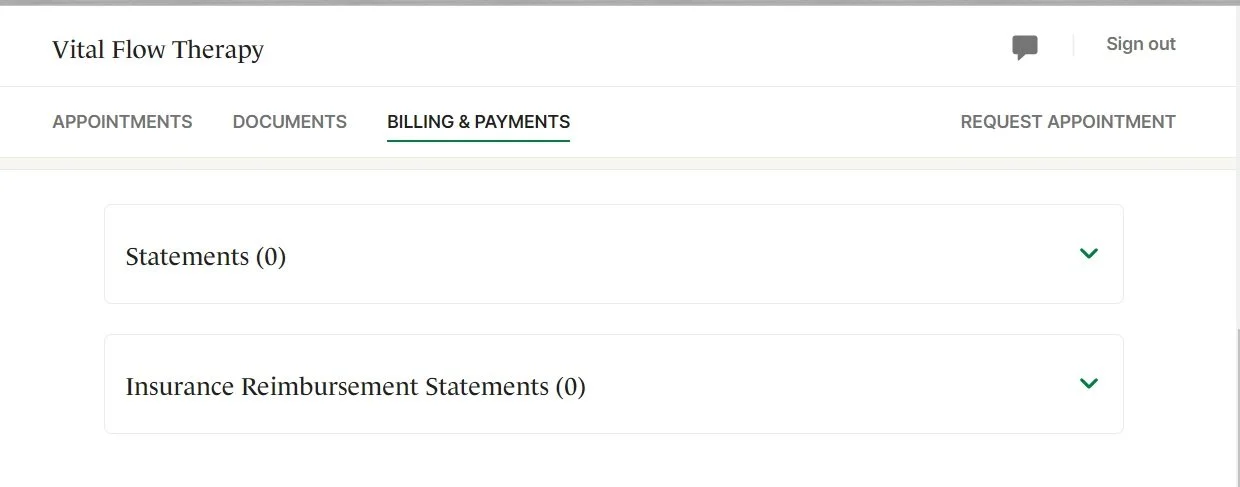
Past superbills can also be viewed on the Billing & Payments page of the client portal, as seen below. They are tucked into the Insurance Reimbursement Documents section so make sure to click to expand that section.
Step 2: Set up Reimbursify and submit your claims
Reimbursify is available as a free app for both iOS and Android - find the download links here.
Open Reimbursify once its downloaded and it will guide you through the set up process. Using the information on the superbill you got in step 1, go thru the prompts in Reimbursify to complete and submit your first claim. If you have any questions, you can go to this support page for more help.
Step 3: Check on status after 3-5 Weeks
Occasionally the ball gets dropped somewhere along the process whether on Reimbursify’s end or the insurance company end. In order to check, you can log into your insurance company's customer portal 3-5 weeks after submission and look to see the sessions show up in your list of claims/services. If you don't, then something went awry and so reach out to Reimbursify here!
Bonus: Shortcut for submitting future claims:
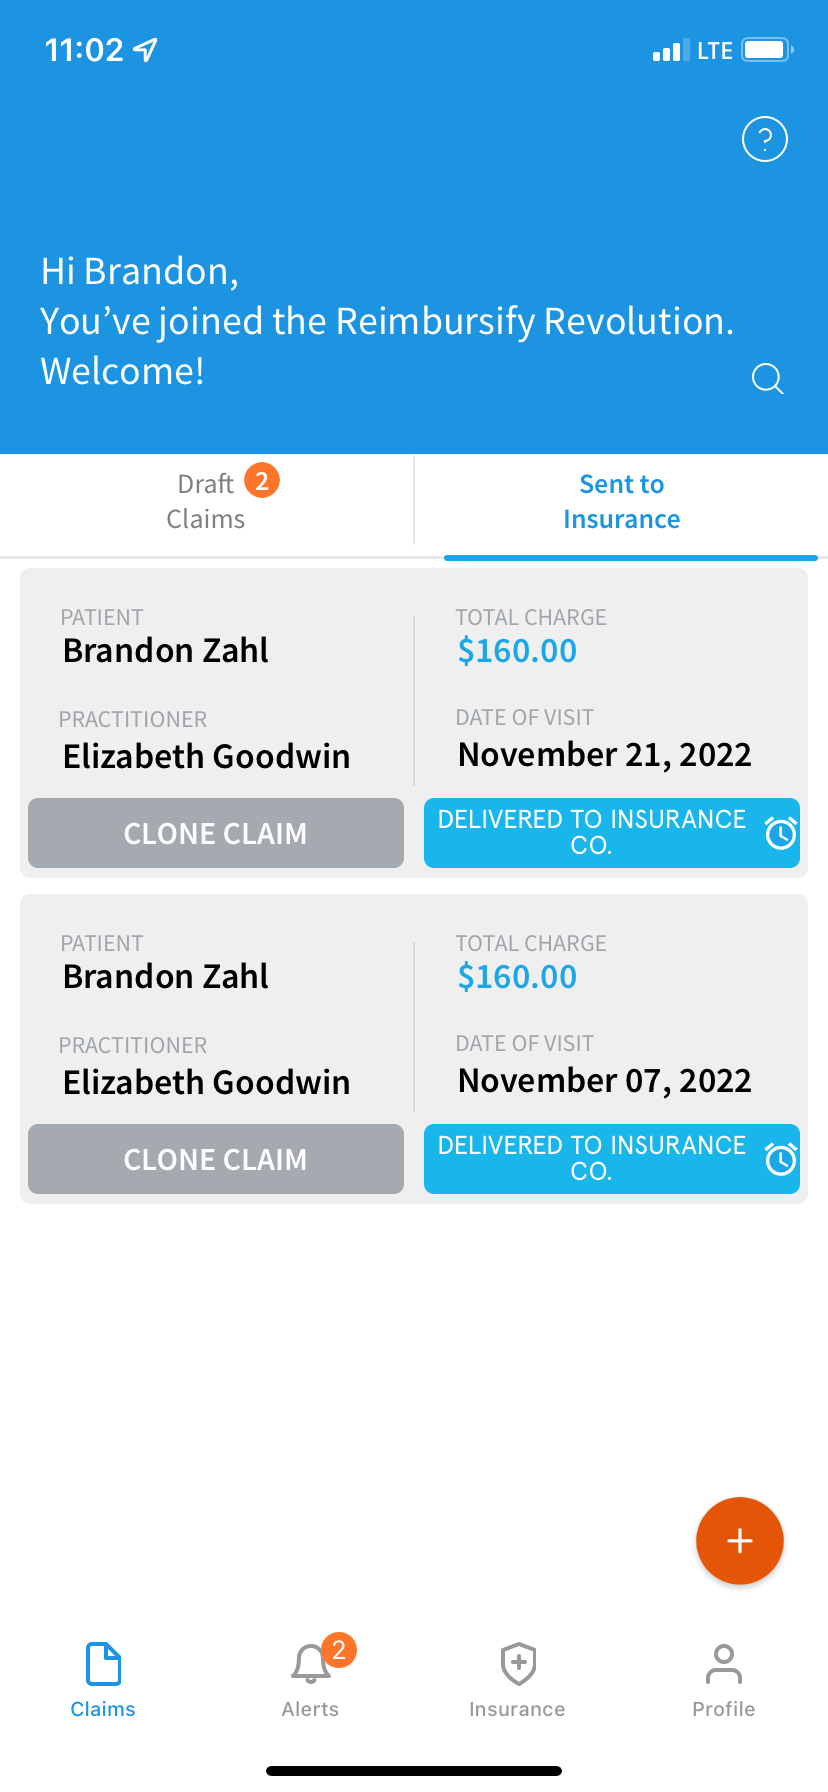
Once you have submitted your first claim, submitting subsequent claims is much easier as you can duplicate a previous claim and and choose the new dates of service. Just navigate to “Sent to Insurance” and select “Clone Claim.” Before you do this, be sure to check that the Service/CPT codes are the same between the old and new sessions on the superbill. If you were late to a session, the superbill line item for that session may have a have a different Service/CPT code because the appointment duration was shorter. If this is the case, you will need to create the claim from scratch instead of using clone claim.